Average response time: under 24 hours
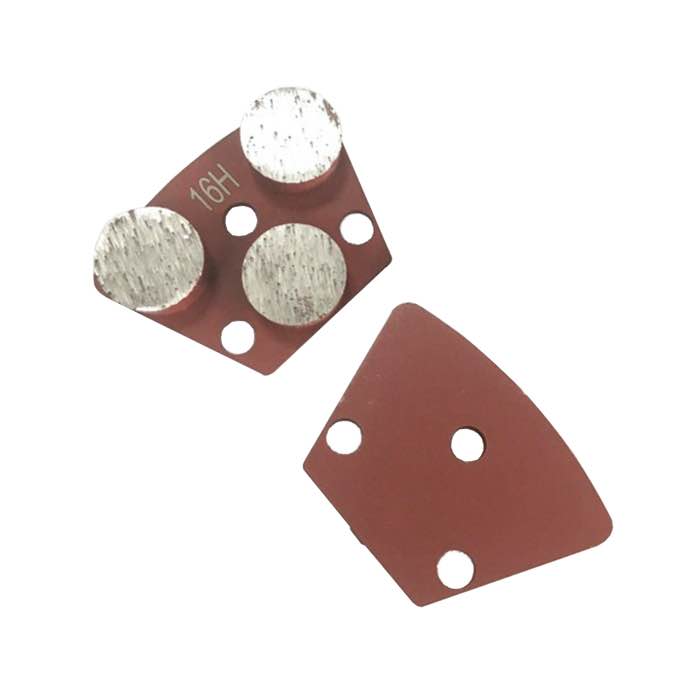
Grind a new concrete patch flush with the old slab using a coarse diamond cup wheel first, feathering the edge over 100-150 mm so there is no step, then step through medium and fine grits to blend texture. Wait at least 7 days for a standard patch mortar (or the product manufacturer's cure time) before grinding; grinding too early pulls aggregate out of the fresh repair.
Concrete patches, regardless of the product, are almost always higher than the surrounding slab once cured. The repair material shrinks slightly but is screeded proud of the surface to account for finishing. Grinding removes that excess and blends the patch edge. The key timing point: wait for cure. Standard Portland-cement based patch mortar needs 5-7 days to reach enough strength to grind without pulling aggregate. Fast-patch products may cure in 4-24 hours but still recommend waiting 24 hours before grinding. Always follow the product datasheet.
A single-row or puck-style diamond cup wheel removes the high patch material quickly. Use a 115-180 mm cup on an angle grinder for small patches, or a 250 mm walk-behind plate for patches larger than 1 m. Take 2-3 mm per pass.
After the patch is flush, switch to a medium metal-bond or hybrid diamond disc to remove swirl marks left by the coarse cup. This pass blends the old slab texture with the patch so the boundary is less visible.
For interior floors that will be sealed or polished, finish with a 150-300 grit resin or hybrid pad. This gives a uniform sheen across patch and old slab.
Start in the middle of the patch and grind outward toward the edge. Do not start on the edge; you will dig a trench. Bring the patch down to about 1 mm above the surrounding slab. Stop; you will blend in the next step.
Overlap the patch edge by 100-150 mm onto the old slab. Tilt the grinder very slightly (5 degrees) and feather the transition so there is no discernible step. The goal is a ramp, not a line. On a walk-behind grinder, use the machine's natural float; on an angle grinder, keep the cup flat and move in wide arcs.
Lay a straightedge across the patch boundary. You should feel no step when you run a finger over it. A step of 1 mm or more will catch light and show through any coating. Re-grind until the transition is invisible to the touch.
Run the medium disc across the whole patched area and 50 cm beyond. Then the fine disc. Each pass should cover the area of the previous one. Do not skip grits; a coarse swirl cannot be polished out with a fine pad.
Even when flush, a new patch often looks slightly different in color from the old slab. Grinding will not fix color difference; it only fixes height and texture. To improve color match, use a patching mortar that is pigmented to the old slab, or apply a uniform concrete stain, densifier, or sealer over the whole floor. On exterior jobs, weathering over 2-3 months usually blends most color differences naturally.
Once the patch is flush and textured, clean the area thoroughly with a HEPA vacuum. Do not use a broom. Apply the same sealer, densifier, or coating used on the rest of the floor. Sealing over a clean, dry patch prevents water from getting under the edge and delaminating the repair. For exterior patches, leave unsealed; water vapor must escape.
For patches smaller than 300 mm, a 115 mm angle grinder with a cup wheel is enough. For patches larger than 1 m, use a walk-behind grinder; hand grinding a large patch will leave an uneven finish and takes four times as long. For long joints (control joints, crack repairs), use a 100 mm edge grinder with a narrow cup wheel to avoid grinding a wide swath.
Patches blended correctly are virtually invisible after 2-3 months of foot traffic. Patches ground badly show up as a rectangle on the floor forever. Spend the extra 10 minutes on the feather edge.
Written and reviewed by JOY TECH — an SGS & BV audited, CE/RoHS certified diamond tools manufacturer founded in 2004, exporting to 50+ countries.
Our factory and QMS are audited by SGS and Bureau Veritas. Products meet CE/RoHS requirements and every piece is 100% inspected before packing.
Verified Certificates
