Average response time: under 24 hours
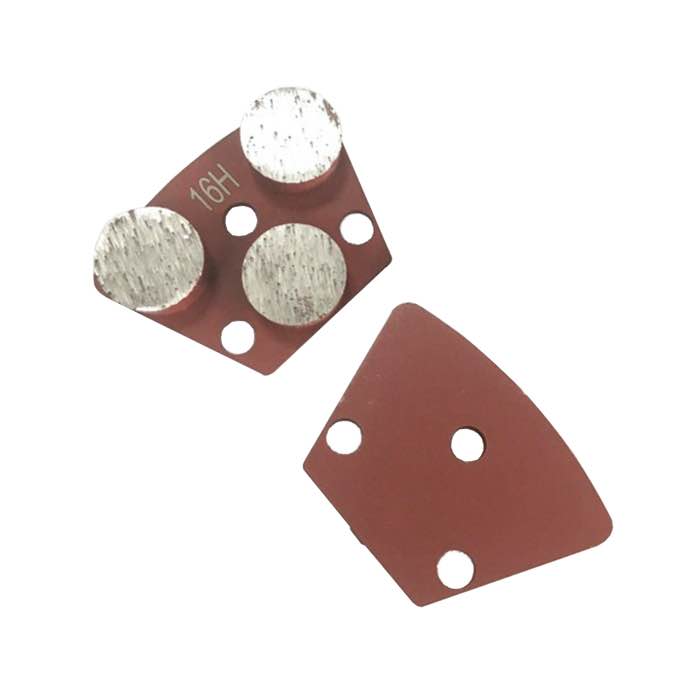
Ridges in a self-leveling compound (SLC) come from a missed trowel pass, a stopped pour, or a tool mark left before the SLC went off. Grind them down only after the SLC is fully cured, typically 16 to 24 hours, using a 30 to 40 grit diamond shoe at 0.2 to 0.5 mm per pass. Do not grind into the old slab underneath; the SLC layer is usually 3 to 6 mm thick and grinds through fast. Dry grinding is fine after cure; grinding wet or early turns the SLC into a slurry that traps the diamonds.
Self-leveling compound is poured as a fluid and spreads on its own, but it is not magic. A ridge appears when the pour stops mid-flow, when a vent bubble breaks and leaves a peak, or when a trowel or spiked roller drags a line through the surface before the set. The result is a hard, smooth, slightly raised strip that the tool left behind. On open floor it is rarely visible; under thin-set tile or polish it shows up as a shadow line across the whole slab.
Most floor-leveling SLC layers run 3 to 6 mm on residential and 6 to 12 mm on commercial work. That number tells you how deep you can grind before you hit the old slab. A ridge 1 mm high on a 3 mm layer leaves only 2 mm of buffer; two more heavy passes and you are through to the substrate. Measure the layer at the edge of the pour before you start.
Fresh SLC is dusty and soft for the first few hours, hard enough to walk on after about 4 hours, but still too weak to grind. Wait 16 to 24 hours for typical products; fast-set blends allow grinding at 8 to 12 hours. If the dust feels like fine powder rather than sharp grit, the layer is not ready. Grinding early abrades the surface, pulls aggregate loose, and leaves a pitted patch that needs a second coat.
Mark the ridge line with chalk. Mount a 30 to 40 grit soft-bond diamond shoe on a walk-behind grinder, set the head to low leveling speed, and make one pass across the ridge only. Shallow cuts, 0.2 to 0.5 mm each, then stop and feel the line with your hand. The goal is a flat transition, not a mirror. Once the ridge is gone, step up to 60 grit and blend 200 mm on either side. Keep the vacuum on; SLC dust is finer than concrete and blows everywhere, so close doorways and tape off vents before you start.
After full cure, dry grinding is standard. Before cure, dry grinding pulls the surface off in sheets and wet grinding turns the powder into glue that loads every diamond. If you must touch up a soft ridge before the window, use a hand-held scrubber, not a grinder. Operators who grind fresh SLC to save time usually spend an extra day re-patching the pits they made.
Dry is the default because SLC dust is fine but manageable with a HEPA vacuum. Wet grinding is only needed if the layer is over 10 mm and produces silica clouds; even then, plan a separate wet pass, not a mix. Keep the vacuum running through dry work, and empty the bin often; SLC powder packs tight and clogs filters fast.
The old slab under the SLC is the line you do not grind through. You know you are approaching it when the dust changes color from off-white to grey concrete, and when the shoe suddenly bites harder on rougher substrate. Stop at the first sign. A hole through the SLC exposes the old slab, traps moisture, and delaminates the patch. A 0.5 mm proud ridge is better than a through-grind hole.
| Signal | What it means | Action |
|---|---|---|
| Dust turns grey | Near substrate | Stop immediately |
| Ridge gone, line faint | Flat enough | Blend and move on |
| Shoe bites harder | Hit old slab | Back up, lighter pass |
A ridge ground flat but left at a different grit shows up as a glossy band under light. Step the grits up with the surrounding floor: if the rest of the slab is at 80 grit, blend the patch zone to 80 grit too. Run the vacuum the whole time. The final check is a strong work light at a low angle: if the shadow line is gone, the transition is done.
If the ridge is over 2 mm, or if the SLC layer is under 3 mm, grinding it down may punch through. In that case, grind the high point light, skim the adjacent low line with a tiny dab of fresh SLC, and re-cure. It is slower, but it beats a through-grind hole that needs a full patch repair.
Roll a 2 m straightedge across the ridge line in both directions. Run your hand along it; you should feel nothing. Inspect the dust color one more time to confirm you did not nick the substrate. Mark any remaining high spot for a later light pass. Done right, the self-leveler floor is flat, uniform, and ready for whatever topping or coating goes down next.
Written and reviewed by JOY TECH — an SGS & BV audited, CE/RoHS certified diamond tools manufacturer founded in 2004, exporting to 50+ countries.
Our factory and QMS are audited by SGS and Bureau Veritas. Products meet CE/RoHS requirements and every piece is 100% inspected before packing.
Verified Certificates
