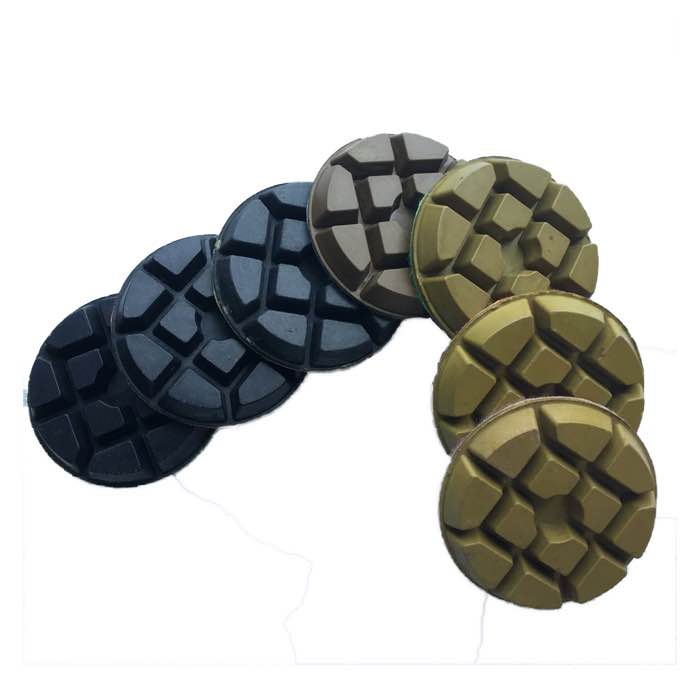
Polishing a concrete floor is a four-stage process: grind flat with metal-bond diamonds, apply densifier, refine with resin-bond pads from 150 to 3000 grit, then burnish. Start with 30/60 metal to flatten, densify at around 150-300 grit, and step up through resin grits without skipping. A typical garage or basement takes a weekend with a rented grinder and HEPA vacuum.
Use a walk-behind grinder with metal-bond trapezoid discs. Work in overlapping cross-passes until the floor shows a uniform scratch pattern with no glossy patches. For a Husqvarna-style plate, start with a velcro backing adapter later in the process; metal grinding uses rigid segments, not velcro.
After 150-300 grit (or after the metal grind), spray densifier evenly. Let it soak per the manufacturer (usually 20-40 minutes), keeping the surface wet. This hardens the cream and prevents dusting. Skip it and the floor will never polish to true gloss.
Switch to resin pads on the velcro backing. Step 150 → 300 → 500 → 800 → 1500 → 3000, vacuuming between steps. Use flexible resin pads such as the diamond resin polishing pads for consistent scratch removal. Stop at the sheen you want: 400 for satin, 800 for polished, 1500-3000 for mirror.
Finish with a high-speed burnisher (1500-3000 RPM) fitted with a dry wool or resin pad, e.g. dry wool burnishing pads. This raises the final reflection and flattens tiny micro-scratches.
Stop at 400 grit for a satin home look, 800 for a polished commercial floor, 1500-3000 for a mirror. More grit costs more and shows every flaw. Garage floors often stop at 400-800; showrooms go to 3000. Plan the target before buying pads.
Polished concrete is low-maintenance: dust-mop, neutral-clean, and burnish annually. It never needs wax or re-coating. Avoid acidic cleaners that etch the surface. Mats at entry points reduce grit scratches.
Metal grinding is the slowest stage. Densifier cure waits. Resin polishing goes faster. Plan a full weekend for a two-car garage. Rushing the densifier cure is the most common DIY mistake.
Rent the grinder, vac and burnisher. Buy the resin pads and densifier — they are consumables and cheaper bought. Ask the rental yard to set up the machine and show you the controls.
Polished concrete is not as uniform as epoxy. It shows natural variation. Show samples. Clients who understand that are happy; those expecting a perfect plastic look are not.
Stop at the sheen you planned. Going higher than needed costs money and flaws. Garage floors rarely need 3000 grit.
Walk-behind grinder, HEPA vacuum, metal discs 30/60/120, densifier, resin pads 150-3000, velcro adapter, burnisher optional. Rent the machine and burnisher; buy the consumables. Plan a full weekend.
Avoid these four and the result is professional.
Polished concrete is a repeatable four-stage process. Grind, densify, refine, burnish. Discipline in grit steps is what gives the shine.
Rushing the densifier cure is the top DIY mistake. Wait the full recommended time. It is cheaper to wait than to re-polish a hazed floor.
Expect a learning curve on the first floor. The second garage will go twice as fast.
Once done, enjoy a low-maintenance floor that never needs wax.
A: Mostly machine rental and pads; a one-car garage may use 2-3 sets of resin pads plus a densifier.
A: For tiny areas, an angle grinder with resin pads works, but a walk-behind machine gives a flat result.
Decades with occasional burnishing; it never needs waxing or re-coating like epoxy.
Yes for a durable polished floor; without it, the surface dusts and will not gloss.
Polished concrete is a repeatable sequence: grind, densify, refine, burnish. Discipline in grit steps is what gives the shine. Contact JOY TECH for a complete resin pad set from 150 to 3000 grit.
