Average response time: under 24 hours
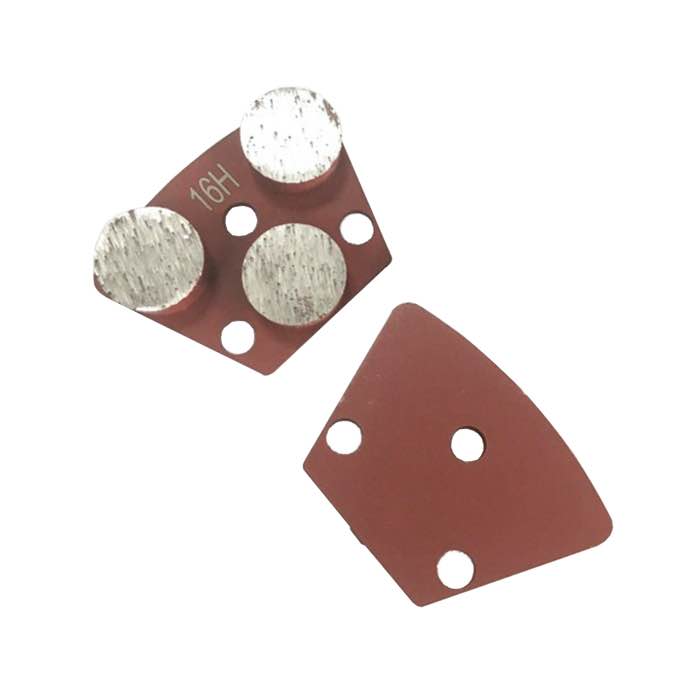
Leveling a low or high spot is a two-step job: grind the high side down with a low-speed leveling pass, then fill the low side with a thin patch from 1 to 3 mm thick, up to 6 mm on isolated dips. Wait for the patch to cure fully before grinding it again, typically 12 to 24 hours depending on the product. Check the result with a 2 m straightedge and feeler gauge. The mistake is grinding the high spot too deep, which turns a 1 mm dip into a 6 mm patch job and costs you a full day.
Not every floor needs grinding, and not every dip needs patch. Walk the slab with a 2 m straightedge before you start. High spots read as shadows under the bar; low spots read as daylight underneath. Mark them with chalk and measure the gap with a feeler gauge. Anything under 1 mm is usually within tolerance for tile and glue-down; anything over 3 mm shows up under polished sealer and thin-set tile. You are deciding which tool, not whether to work.
The rule is simple: remove material where it is high, add material where it is low. Grinding a high spot costs minutes; patching it costs a full cure cycle. Patching a low spot costs hours; grinding it down costs nothing if the slab under it is sound. Most bad jobs flip the rule and end up grinding the whole floor flat instead of addressing the one ridge.
Thin-patch repair mortars are designed for 1 to 3 mm beds. Deep dips over 6 mm need a different product or a build-up in two coats. Do not try to fill a 10 mm crater with a 3 mm product; it will shrink, crack, and delaminate. Read the bag before you open it.
Use a walk-behind planetary grinder at reduced speed, not the polishing speed. Mount a soft-bond 30 grit diamond shoe and take shallow cuts, 0.2 to 0.5 mm per pass, moving back and forth across the marked high spot. Keep the vacuum running. Check after every few passes with the straightedge; operators tend to over-grind once they see the first flat streak. Stop when the high side reads within 1 mm, even if it means leaving a faint ridge. A second pass on a spot already flat only digs the bowl deeper and pulls the surrounding low area out of tolerance.
Patch goes on a clean, sound, slightly damp concrete. Blow out dust with low-pressure air, then wipe the area with a damp cloth. Mix the repair powder with clean water to a milkshake consistency, pour onto the dip, and spread with a trowel or gauge rake. Pull a straight edge across to screed it off, then finish with a damp sponge float. Do not feather the edges too thin; they will shrink back and leave a lip.
This is where operators lose a day. A 1 to 3 mm thin patch needs 12 to 24 hours before it can be walked on and ground; some fast-set products allow light grinding after 4 hours. Grinding too early tears the patch out; grinding too late delays the whole job. Cover it with plastic if dust is flying, and mark the area so nobody walks over it with boots.
Once cured, the patch joint is slightly proud and needs a light pass to blend with the slab. Use the same grit as the surrounding floor, at low pressure, for one or two passes. Do not grind down to the raw concrete; the patch color is slightly different and over-grinding makes it more visible, not less. Check flatness again with the straightedge. The goal is a transition invisible under a 2 m bar, not a mirror surface.
| Defect | Action | Typical time |
|---|---|---|
| 1 mm high spot | Grind with 30 grit, shallow | Minutes |
| 1 to 3 mm low dip | Thin patch, one coat | 12 to 24 h cure |
| 3 to 6 mm dip | Patch in two thin coats | 24 to 48 h total |
A 2 m straightedge with feeler gauges is the standard on commercial floors. Roll the bar in all directions and note where the gap exceeds tolerance. For polished concrete, hold the bar at 100 lux from a work light and read the shadow; for thin-set tile, a 3 mm gap over 2 m is the usual limit. Do not trust the naked eye; floors always look flatter in bright light.
Stop when the straightedge passes, even if the patch looks different. Over-grinding to make a color match burns through the patch and thins the slab. Color is fixed later with densifier and stain, not with a diamond. Operators who chase a perfect match with the grinder usually end up with a soft, dusty patch that needs redoing.
Leveling is not polishing; it is a repair phase that needs its own day. Walk the slab, mark defects, grind highs, patch lows, cure, blend. If you skip the cure window, the patch fails and you spend longer fixing it than you saved. A flat floor is the foundation everything else sits on; rush it here and every later step shows the cost. Book a full extra day for leveling on any commercial bid, even when the floor looks flat at first glance.
Written and reviewed by JOY TECH — an SGS & BV audited, CE/RoHS certified diamond tools manufacturer founded in 2004, exporting to 50+ countries.
Our factory and QMS are audited by SGS and Bureau Veritas. Products meet CE/RoHS requirements and every piece is 100% inspected before packing.
Verified Certificates
