Average response time: under 24 hours
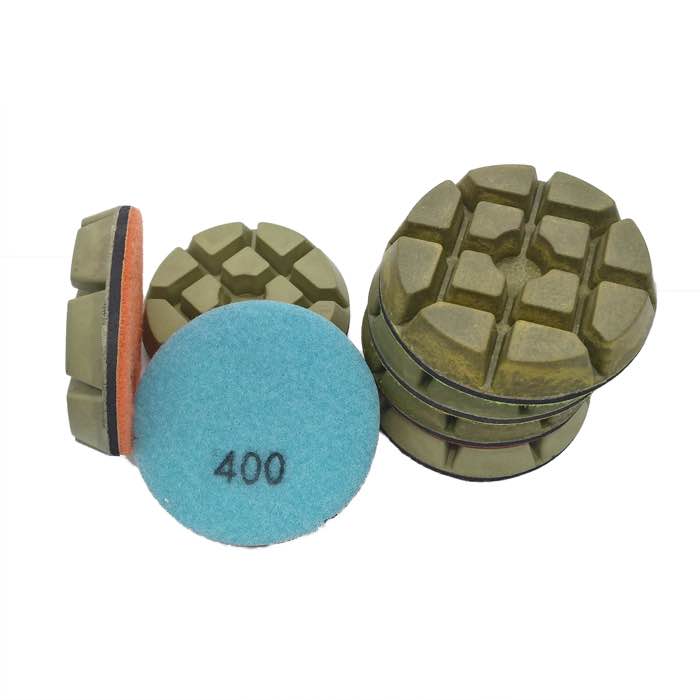
Detail polished concrete wall lines and edges with a hand-held angle grinder fitted with diamond resin pads that match the grit sequence of the main floor, working from the coarsest grit on the floor outward. Grind 5-10 cm out from the wall, feather the edge, and finish with the same densifier and burnishing pad used in the center of the room. The goal is a seamless transition: when you turn off the lights and look across the floor at wall level, there should be no visible line where the edge work stops.
A walk-behind grinder cannot reach within 15-20 cm of a wall. That strip has to be done by hand. If it is skipped, the floor shows a rough, unpolished border around every perimeter, column, and step. If it is over-ground, the edge looks duller or glossier than the field and the seam is obvious. Edges also take more abuse: they are swept, mopped, and bumped, so the finish there must be as dense and hard as the center of the slab.
Use a 100 mm or 125 mm angle grinder with a 5/8-11 thread, a variable-speed head that runs at 3,000-4,000 RPM, and a vacuum-capable shroud. Hook-and-loop diamond resin pads in 50, 100, 200, 400, 800, 1500, and 3000 grit let you match the floor sequence exactly. The diamond resin pad range is the same product line used on the walk-behind machine, so grit and bond match the field without compromise.
The worst mistake is polishing the field first and doing edges last. By then the slab is sealed and you cannot grind the edge without scratching the center. Instead, grind the edge strip at every grit step in parallel with the floor: when the walk-behind does 50 grit, do the edge strip at 50 grit; when the walk-behind does 100 grit, do the edge at 100 grit; apply densifier to the whole slab, edges included, at the same time; continue through 400, 800, 1500, and 3000 grit on both floor and edge together.
Feather the last 5 cm of every pass. Tilt the angle grinder slightly so the pad lightens as it moves toward the already-polished field. That feather creates the invisible transition line. A sharp, non-feathered stop leaves a visible seam under grazing light.
Hand angle grinders put more pressure on the edge than walk-behind machines put on the field. That extra pressure can dig a scalloped groove along the wall if you are not careful. Keep the grinder moving at a steady pace, and do not lean into the tool. The weight of the grinder is enough pressure; your arm is only steering.
Where polished concrete meets tile, carpet, or a non-polished slab, the edge must be a clean, straight cut. Use a walk-behind grinder with a straight edge guide on the final passes, then hand-finish. Do not try to feather the transition into carpet; polished concrete and carpet meet at a metal or rubber threshold, and the concrete edge should be square, not tapered.
At doorways between two polished rooms, run the densifier and final burnish across the threshold so the sheen continues. The burnishing pad on a high-speed buffer is the best tool for crossing door thresholds without leaving a buffing line. Work the buffer back and forth across the doorway until the gloss reads the same on both sides of the door frame.
Columns, drain pipes, and floor penetrations are the second hardest detailing zone. Use a 50 mm diameter hand pad on a small angle grinder for the tight circles. Start at the same grit as the floor and work outward. For tight corners where even a 50 mm pad will not fit, use a hand-held diamond block to do the last 2 cm by hand. It is slower, but it is the only way to avoid an obvious rough patch around a column base.
Around floor drains, stop polishing 5 cm from the metal flange and finish by hand with a small pad. Do not let the walk-behind grinder chew on the drain grate. For pipes that penetrate the slab, wrap the bottom of the pipe with masking tape before grinding to protect the finish, and hand-finish the ring around it at the final grit.
A 100 mm pad covers more area but will not fit into tight corners. A 50 mm pad reaches into corners but cuts slower. For most rooms, start with the 100 mm pad for the long wall runs and switch to a 50 mm pad for columns, corners, and pipe penetrations. Keep the grit sequence identical between the two pad sizes so the finish matches.
After the final burnish, turn off the lights and shine a trouble light at a low angle across the floor. Walk around the perimeter and look for dull patches along the wall where the edge grit skipped a step, circular swirls around columns from an over-tilted angle grinder, a visible seam where the feather stops, and missing densifier, which shows as a lighter dusty band.
If the light reveals a defect, go back one grit and re-work that strip. For large open floors where edge work dominates, the 3-step resin pad system can shorten the sequence while still matching the field finish.
Written and reviewed by JOY TECH — an SGS & BV audited, CE/RoHS certified diamond tools manufacturer founded in 2004, exporting to 50+ countries.
Our factory and QMS are audited by SGS and Bureau Veritas. Products meet CE/RoHS requirements and every piece is 100% inspected before packing.
Verified Certificates
