Average response time: under 24 hours
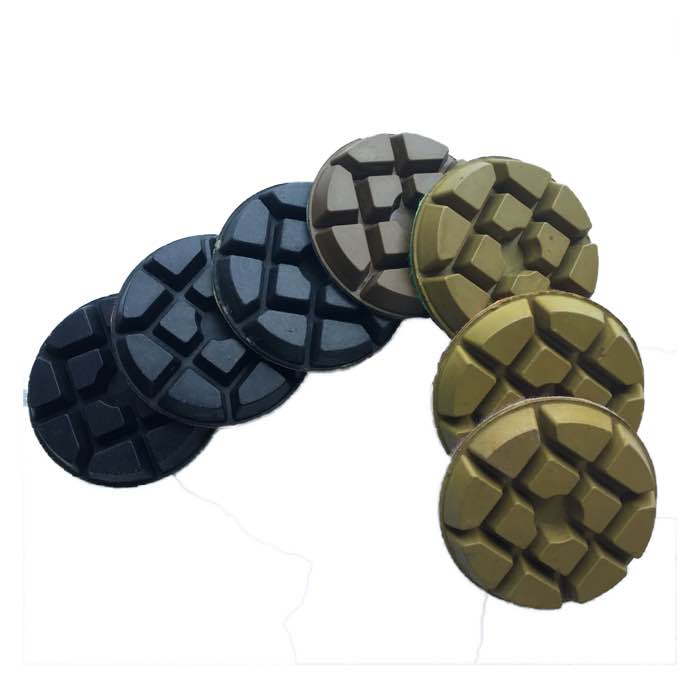
Polishing concrete floors is a 7-step process: (1) inspect and repair the slab, (2) grind with metal-bond diamonds starting at 30/40 grit and progressing to 150/180, (3) apply lithium or sodium densifier, (4) transition to resin-bond pads starting at 50/100 grit, (5) polish through 200, 400, 800 grit, (6) finish at 1500 or 3000 grit using a resin polishing pad, and (7) impregnate with a guard or sealer. A planetary grinder with 3 or 4 rotating heads is required; a single-disc grinder cannot reach a uniform high gloss. Plan on 4-8 passes per grit and HEPA-vacuum between steps.
Polished concrete is not "painting" the floor — it is mechanically refining the surface like a piece of stone. The process opens the concrete, exposes the aggregate, densifies the paste to lock in durability, and then abrades the surface with progressively finer diamond-impregnated pads until it reflects light. The result is a floor that is harder than the original concrete, dust-proof, and reflective enough to read a shadow in. There is no film to peel, which is why polished concrete dominates warehouses, retail showrooms, airports and schools.
Before touching a grinder, look for moisture (RH below 75% per ASTM F2170), active cracks, spalls, and old coatings. Repair structural cracks with epoxy injection; fill hairline cracks with a matching cement grout. Strip any old adhesive, paint or cure compound with PCD coating-removal tooling. Sweep and HEPA-vac the floor. Decide on the exposure level you are selling: cream (lightest, paste only), salt-and-pepper (fine aggregate), or aggregate exposure (coarse stone visible).
| Exposure level | Start grit | Look | Typical use |
|---|---|---|---|
| Cream | 60/80 | Smooth, uniform cement paste | Offices, retail light |
| Salt-and-pepper | 30/40 | Fine aggregate flecks | Retail, showrooms |
| Heavy aggregate | 16/20 or 30/40 | Visible coarse stone | Industrial, decorative |
Mount metal-bond trapezoid shoes on the grinder and work in overlapping 60 cm strips. Start at 30/40 grit for medium slabs, 16/20 for very hard or coated slabs, and 60/80 if you only need a cream finish. Grind until the surface texture is uniform across the whole area — no shiny low spots, no tool marks. Then move to 60/80, then 120/150. HEPA-vac between grits. The triple-round-segment trapezoid disc is a versatile starting point for general commercial slabs.
Once the 150/180 metal-grind is complete and the floor is clean, spray the densifier. Lithium silicate is the modern default: it is low-odour, does not leave a white residue, and cures in 1-2 hours. Sodium and potassium densifiers are cheaper but require more flooding and neutralisation. Flood the surface, keep it wet for 20-30 minutes, then broom in and wipe off excess. Let it cure overnight before resin polishing. The densifier reacts with free lime in the concrete to form calcium silicate hydrate, hardening the surface to 50-70 MPa.
Switch to resin-bond polishing pads. The exact grit ladder depends on the finish level you want, but the standard commercial sequence is 50/100 → 200 → 400 → 800 → 1500 → 3000. At each step, grind until the previous scratch pattern is completely gone — under-polishing at 400 grit will never look right at 1500. Use a resin floor polishing pad for the 400-800 steps and a finer spiral resin pad for the final 1500-3000 gloss. Run the machine at slow walk pace; do not push.
A polished concrete floor is technically done after 3000 grit, but applying a topical guard (silane/siloxane or acrylic) raises stain resistance — critical in retail and food-service areas. Do not apply a thick epoxy film; that defeats the purpose of polished concrete and will delaminate. A penetrating guard leaves the floor breathable and invisible.
Typically 2-3 days with a 3-head planetary grinder: day 1 metal grinding and repairs, day 2 densifier cure + resin polishing, day 3 final gloss and guard. Smaller crews or single-disc grinders need twice that.
Yes, as long as it is structurally sound, free of major delamination, and not contaminated with curing compounds or sealers that have penetrated deeply. Test with a wet rag — if water beads for more than 5 minutes, you have sealer to strip first.
1500 grit gives a satin-to-low-gloss finish. True mirror-like reflection requires 3000 grit followed by a high-speed burnish with a floor pad at 1500-2000 RPM.
Not for standard commercial work. Dry polishing with a HEPA extractor is industry standard. Wet polishing is reserved for white-cement decorative floors where water brings out the deepest clarity.
Polishing concrete is a controlled mechanical process: grind, densify, refine, polish. Use the right metal-bond shoes and resin pads, respect the grit sequence, and never skip the densifier. The result is a floor that costs less over its life than epoxy, never peels, and looks better with every year of traffic.
Written and reviewed by JOY TECH — an SGS & BV audited, CE/RoHS certified diamond tools manufacturer founded in 2004, exporting to 50+ countries.
Our factory and QMS are audited by SGS and Bureau Veritas. Products meet CE/RoHS requirements and every piece is 100% inspected before packing.
Verified Certificates
